Category Archives: Residential

A+ Quality in Every Insulation Installation

house wrapped in cozy covers and is insulatedInsulation is seldom discussed but is crucial to the well-being, comfort, and protection of a family. Often, the original insulation installed will last for many years. But sometimes, problems happen, such as:

  • Older homes that have insulation that is hazardous to the family’s health.
  • Leaks in the roof of the house have damaged the existing insulation.
  • There are times when the insulation material is not compatible with modern electrical lighting in the ceiling it is covering.
  • Some builders have erroneously vented exhausts to the attic space. Humid exhaust air gets trapped in your insulation, thereby ruining it.
  • The insulation installation was inadequate
  • Owners may want to use the attic for storage or an extra room.
  • According to many experts, any home over five years old needs to have its insulation evaluated.

So, at some time or another, you are going to need to insulate your home. And at A+ Insulation, we make sure our customers know exactly what to expect if they need new insulation.

With our 14-Step Installation Process, you will understand how long the installation will take, how we protect your home, how much it will cost, what to expect, and why we include so much in the process. We tell you up-front so there are no surprises, no inconveniences, and no unknowns. You can relax with A+ because we will keep you informed.

A Breakdown of Our 14-Point Installation Process:

  1. Initial Contact – First, call or email us and we will set an appointment to inspect your home.
  2. Free, In-Home, No-Obligation, Inspection – We tell you where and how much insulation you will need.
  3. Free Estimate – We provide a free, upfront estimate before any work begins so you never get a surprise bill with add-ons or extras you were not expecting.
  4. Free Home Energy Evaluation – The home energy evaluation helps us see where your home is leaking energy so we know exactly which problem areas to fix.
  5. Pre-Installation Walk-Through – Before we begin working, we take you on a walk through the project area to explain where and why insulation is necessary.
  6. Scheduling – We set a date that fits your schedule.
  7. Job Length Estimation – After assessing the project, we give you a time estimate of how long we will be in your home from start to cleanup.
  8. Project Debris – We take special care to protect your home and your family from any contact with our insulation materials or our equipment. We want your home to look perfect when we leave.
  9. Installation – We not only install the insulation, but we go the extra mile to seal all leaks where air can escape.
  10. Post-Installation Walk-Through – A+ wants to leave its customers completely satisfied with the job. When the project concludes, we show you our work so you know we did exactly what we said we would do.
  11. Before & After Photos – To make sure there is no doubt about our completed project, we provide photographic evidence that shows attics and crawl spaces, which would otherwise be hard to see, insulated completely and correctly.
  12. Cleanup – We always leave your home as clean as we found it.
  13. Final Payment – Once we are positive you are completely satisfied with our work, we accept final payment.
  14. Comfort Assurance – We leave you comfortable with the job, with the price, and with our company. We also leave you in the comfort of your well-insulated home.

Related Read: Insulation Installation – The Devil Is in the Details

Quality in Every Insulation Installation

A+ does not want its customers to have any surprises when it comes to their home insulation process. Nothing is worse than contracting with a company that does not live up to its promises and the owner’s expectations. That will not happen with A+. The most important issue for us is that your home insulation is up to or even better than all local building codes for your area. Since 90% of homes in the U.S. are under-insulated, yours could very well be one of them. And, oh yes, one more thing; the proper insulation will make a noticeable difference in your heating and cooling bills. Let us know if need our assistance.

If you’d like to save money on your energy bills, give A+ Insulation a call at (913) 281-2250 or (816) 268-7511 or contact us online.

Compare before you hire. Use this handy list to know which questions to ask when comparing insulation companies. Download by clicking on the image below:  

Checklist

Make Your Home Energy Efficient This Summer

Home Energy Bill SavingsAir conditioning season can be brutal on your budget. Energy bills soar and it makes you start to question everything about your home. Is your air conditioner losing efficiency? Does your home need more insulation? Should you invest in new, energy-efficient windows? The team at A+ took a look at all of your options.

Look at Investment Vs. Savings

It’s a struggle to know which decision is the right one. At A+ Insulation, we see homeowners struggle with energy issues year round, especially when the temperatures soar or dip into the extremes. Naturally, we’d like to sell you some insulation. That is our business, after all. But when looking at high energy bills, many homeowners consider the energy savings before making a decision to purchase, but it’s the investment cost that you should be looking at. Let us break it down for you.

The Top Three Ways to Significantly Reduce Your Energy Bills

If you want to significantly reduce your energy bills, you have three main choices:

  • New Replacement Windows
  • New, High-Efficiency Air Conditioner
  • Add Insulation  

Let’s look at savings vs. investment with numbers we found on the internet:

Install New Replacement Windows

Windows are a source of 25% of a home’s heat loss.

SavingsAccording to the Energy Star website, installing ENERGY STAR qualified windows lowers energy bills. For a typical home, save: $126$465 a year when replacing single-pane windows. $27$111 a year when replacing double-pane, clear glass replacement windows.

Investment – According to Houselogic, the range for energy-efficient window pricing varies greatly, but Energy Star-qualified windows start around $120 for a 36-inch-by-72-inch, single-hung window and can go up to 10 times that. With labor, you’re looking at about $270 to $800+ per window.

Conclusion – Savings up to $465/yr vs. Minimum Investment $2,700 (for 10 windows).

Install a New Energy-Efficient Air Conditioner

Heating and cooling costs account for about half of your home’s energy expenses.

Savings – Using the Lennox energy savings calculator, and using Kansas as our geographic point,  if you replaced your old (10 SEER) air conditioner with an energy efficient (15 SEER) air conditioner, you would save 33% on your home cooling bills

($375 over a 5-year period) which calculates to $75/yr.

Investment – According to HomeAdvisor, 2017 prices for new air conditioners range from $1,900 to $5,100.

Conclusion – Savings up to $75/yr vs. Minimum Investment $1,900.

Install Attic Insulation

Roughly 25% of a home’s heat seeps out through the attic and roof.

Savings – According to House Logic, adding insulation (based on boosting the amount of attic insulation from R-11 to R-49) can lower heating and cooling costs by as much as $600/yr.

Investment – Using the same source, depending on the type of materials you choose, figure on paying about $1,500 to insulate an 800-square-foot attic, which pays back your investment in three years.

Conclusion – Savings up to $600/yr vs. Minimum Investment $1,500.

Savings Vs. Investment Makes It Clear – Insulation Is the Smart Choice

So the bottom line is, if you’re looking for energy savings, but you’re not ready to drop thousands on a new heating and cooling system or new replacement windows, adding insulation is the obvious choice. Insulation is the lowest monetary investment that yields that greatest energy savings.  

If you’d like to save about $600 a year on your energy bills and be more comfortable in your home, give A+ Insulation a call at (913) 281-2250 or (816) 268-7511 or contact us online to schedule your insulation installation appointment.

Window replacement vs insulation

Which Home Improvement Has the Fastest ROI?

ROI on Insulation

There are a lot of ways you can improve your home, from security, to energy savings, to remodeling, but one improvement will pay you back the fastest. Adding or upgrading your insulation has a fast turn around when it comes to return on your investment.

Since insulation is responsible for up to 70% of the total heat gain and loss in your home, the proper type, amount, and installation of insulation can make a huge difference in your savings in the long term. Adding attic and wall insulation can pay for itself in just two years based on the typical amount of energy savings you’ll experience. In just a couple of years, you can save an average of $1,000 in energy savings.

Nine Out of Ten Homes in the U.S. Are Under-Insulated

According to NAIMA (North American Insulation Manufacturers Association), 90% of the homes in the U.S. are under-insulated. What do you think the chances are that your home is properly insulated? Probably not good. Simply adding insulation in the right places will not only save you money in reduced energy bills, but it will add to your resale value when and if you do sell your home.

The Insulation Standards Are Changing

Insulation standards are not what they were a few years ago. In 2015, cities and towns within the Kansas City metro are raised the R-Value that your insulation has to meet. (R-Value is the capacity of your insulation to resist heat flow.) This means new homes, or homes for sale, need to have insulation with acceptable R-Values. Why wait until you sell your house to upgrade. You can do it now and reap the benefits (and ROI) in energy savings and comfort.

Related Read: What You Need to Know about Building Codes When Selling Your Home

Where to Insulate First to Get the Best ROI

Insulating your home is a great way to save on heating costs throughout the winter months and cooling costs in the summer. We always suggest that you schedule an energy evaluation to pinpoint the areas where your home is losing the most energy. As a savvy homeowner, you want to be sure that you’re insulating the areas that will yield the greatest return on your investment. While every home will differ somewhat on the areas that most need increased insulation, this guide will help you determine what sections of your home will save you the most money by adding insulation.

       1. Start in the Attic

  • Attic insulation is one of the most important types to have in a Midwestern home. You know that the warm air produced by your furnace is rising straight up. If your attic isn’t well-insulated, that also means that the heat is escaping straight out! Adding insulation to your attic can increase your energy savings by $120 per year or more in cold climates.

       2. Check the Walls

  • A great deal of heat is lost through your exterior walls, especially if it’s been awhile since your insulation was updated. You don’t want to tear out all of your existing walls to replace the insulation, which is why minimally-invasive tactics that inject insulation into the walls is the best way to go. Annually, this could save you as much as $300.

Related Read: 6 Great Reasons to Insulate Your Home

       3. Don’t Forget the Floors

  • Insulating your floors, especially if they’ve been previously left without insulation, has a similar return to insulating your walls. This is doubly true if you have unused space in other floors of your home that you don’t want to heat all winter (like an unfinished basement). Annual savings? As much as $300.

       4. Save By Insulating Crawl Spaces

  • Crawl spaces beneath your home are necessary to access areas that would normally be impossible to reach. Unfortunately, it’s also a great way to lose a lot of your heat. Insulating your crawl spaces could save you around $200 per year.

Related Read: We Don’t Just Talk the Insulation Talk, We Walk the Walk

     5. The Basement Needs Insulation

  • If there’s nothing between the floor of your basement and the ground, there’s a good chance that you’re steadily losing heat through that space. Instead of letting your heat leach away, add a layer of insulation in your basement! Each year, you can save as much as $300 on this process.

Remodeling Is a Great Time to Upgrade Your Insulation!

Remodeling your home brings exciting visual changes for sure, but did you know that it’s also one of the best times to update your insulation? It’s the perfect opportunity to add more insulation while attic roofs and wall studs are open and exposed. The insulation pros at A+ Insulation have some great tips for insulating during a remodeling project. There are three basic areas to consider; the walls and the attic.

  • Insulating the Walls during a Remodel

If you’re replacing drywall or building new walls, make sure you get the insulation right. Remove all old, wet, or compressed insulation. While you have this opportunity, it’s best to install new insulation so you know it’s all fresh (no mold here) and meets the recommended R-value.

Fiberglass batts or rolls are usually the easiest for homeowners to install. Spray foam will give you even better insulating results, as it expands to fill in any nooks and crannies and seals as it dries forming a vapor barrier. Though spray foam costs more, as it is not a DIY kind of product, it will yield the best R-value.

  • Attic Remodel Tips for Insulation

Attic insulation is critical to keeping your home comfortable especially in the winter months since heat rises and escapes through the roof. Your choice of insulation will depend on the roof framing system.

If the roof is framed with rafters, and the floor space is open, and you can lay insulation batts between the horizontal joists. If the floor is finished, focus on adding insulation to the ceiling of your attic, between the sloped rafters. If you plan to finish a living area in the attic, use paper-faced fiberglass batts in the rafter space, with the paper side facing downward.

If you have roof trusses, blown-in cellulose fiber works well because cutting and laying fiberglass batts in a trussed attic can be labor intensive and tedious. Blown-in insulation creates a uniform blanket of insulation, and it can get into smaller spaces as well. Just make sure that insulation doesn’t block soffit vents or cover heat-producing lights.

Many times, the homeowners start their project only to find their insulation is thicker than the depth of the rafters. To keep the insulation flush with the ends of the rafters so drywall can be added later, furring (attaching strips of wood to add depth to the space between the roof and the rafters to match the depth of the batted insulation) may be necessary. To insulate without furring the rafters, you can install regular batts in the existing rafter spaces, and then add a layer of rigid foam board insulation over the rafters for added R-value. Drywall can be installed on top of the boards for a finished attic.

  • Add Exterior Insulation with New Siding

If you are adding new siding as part of your remodel, make sure it’s insulated. You can buy insulated vinyl siding that comes with rigid foam attached to the back for additional insulation. It’s a great way to add another layer of thermal protection to your home that’s offered by many different manufacturers.

Whether you are remodeling or just want to make your home more energy efficient, call A+ Insulation at (913) 648-9290 or (816) 268-7511 or contact us online to increase the value of your home with new insulation.

Window replacement vs insulation

How The Chimney Effect Burns A Hole In Your Wallet

We all know how a chimney works: Hot air rises, carrying smoke and soot up and out through the roof. The vacuum draws cooler air at hearth level to feed the flames. Most people agree that fireplaces are charming and cozy, and do a lot for a home’s ambiance, but the term “chimney effect” also describes how your home leaks air and feels drafty.

The Chimney EffectGaps Allow Air to Move from the Bottom of Your Home to the Top

The chimney effect (also called the “stack effect”), as applied to home heating and cooling, explains how in winter, our heated air rises through gaps in the roof and upper floor, drawing cooler air inside from gaps along the foundation due to pressure imbalances. In summer, the process is reversed, though the pressure differences occur to a lesser degree.

The taller your home, the more it acts like a chimney; the taller the column of air, the more pressure the column exerts on air exchange.

Sealing Gaps Will Reduce the Chimney Effect

If your winter bills aren’t reflecting the return on investment you’ve put into your heating and cooling systems, or your home feels drafty and uncomfortable, it’s likely that improper sealing is the culprit. An experienced energy consultant can help you identify these common “problem spots” to ensure your money isn’t quite literally slipping away.

Related Read: Free Home Energy Evaluation – Why Wouldn’t You Have This Done?

Thermoscan Technology Pinpoints Air Leaks

Before you can seal any gaps, you must find them. Because air is invisible, it’s hard to know exactly where these leaks in your home exist. At A+ Insulation, during our home energy evaluation, we use Thermoscan technology to seek out these less-than-obvious points of air leakage. Some of the most common leak points include:

  • Plumbing traps
  • Air ducts
  • Recessed lighting
  • Dirt floor basements: chimney effect also compounds risk of radon gas
  • Improper roof & eave venting
  • Appliance vents
  • Combustion furnaces
  • Foundation gaps
  • Wiring courses
  • Doors & windows

If you need help reducing the chimney effect in your home, give A+ Insulation a call at (913) 281-2250 or (816) 268-7511 or contact us online. Our professionals will perform a free home energy audit to find exactly where your home is leaking energy!

New Call-to-action

3 Reasons Spring Is A Good Time To Insulate Your Home

spring insulation
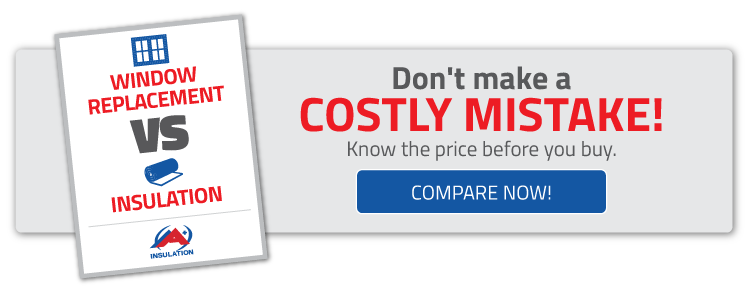
While lack of Insulation is not a visible problem in your home, it can be a very uncomfortable and costly problem. According to NAIMA (North American Insulation Manufacturers Association), 90% of homes in the U.S. are under-insulated. Insufficient insulation causes excessive heat loss in the winter and heat gain in the summer. Homeowners seeking to prevent such costly heat gains and losses should invest in upgrading their insulation.

Related Read: 9 Signs Your Home Is Under-Insulated

The best time to schedule an insulation upgrade is in the spring. Here are three reasons why spring is a good time to insulate your home:

1. Easier Scheduling

Most people don’t even think about insulating until it’s either really cold or really hot. Typically, when air conditioning bills skyrocket, it brings the problem front and center for them. That’s why summer is the busiest time of the year for insulation companies. By scheduling in the spring, you’ll get a jump on the crowds and have your home insulated earlier rather than later ensuring better comfort and more savings.

2. Comfort

The whole point of getting your home insulated is to prevent heat gain in the summer (and heat loss in the winter), which would be counterproductive if you waited until the summer to schedule your insulation upgrade. Spring is ideal because the weather is more pleasant and enjoyable, and not as extreme. Getting your home insulated during the spring assures that your home doesn’t overheat while the work is going on.

3. Summer Savings  

Insulating your home during the spring before the summer heat allows you to reap the benefits all summer long. Typically, energy bills for the summer are high because of the heat. However, homeowners who thought ahead and insulated their homes in the spring will find that their energy bills are significantly lower. Better insulation means less heat gain, which means you’ll be able to set the AC where you usually do, and it will kick on less often. Plus, you’ll be just as comfortable.  

If you’re thinking about insulating your home, give us a call at (913) 281-2250 or (816) 268-7511 to schedule insulation installation or schedule online.  

Get the most for your money! Use this checklist to avoid pitfalls when choosing an insulation company: Homeowner Checklist CTA Hor

Think You Need New Windows? Insulate Instead & Save

Kansas City MO Insulation CompanyHere in Kansas City we get all extremes of weather. Unfortunately, the vast changes in temperature result in climbing energy bills. Escape rising energy costs by investing in proper insulation for your home.

Most homes are not well insulated (the North American Insulation Manufacturers Association (NAIMA) estimates roughly 90 percent of existing U.S. homes are under-insulated) . What does this mean for homeowners? Homeowners spend needless amounts of money in heating costs and their family suffers the discomfort of a drafty home. A properly insulated home is cozy and will cost less to heat. According to Houselogic, you can save up to $600 a year by improving your attic insulation from an R-11 to an R-49.

How Much Heat Are Your Windows Losing?

Windows can account for anywhere from 10- 25% of a home’s heat loss. A poorly insulated window will allow warm air to escape through any gaps along the window frame. This starts a chain reaction of heat loss in a room. Warm air will continually be pulled towards the leaking windows and the result is a chilly room. Oftentimes homeowners make the mistake of replacing windows instead of insulating them. This is a costly choice. Your windows can become energy efficient by simply investing in proper insulation and weatherization.

How Much Warm Air Does Insulation Keep In?

Poor insulation allows warm air to leak out through the attic and roof. These two areas are notorious for heat loss. Roughly 25% of a home’s heat seeps out through the attic and roof. That’s why we always recommend that it’s the first place you start when insulating your home! A quality attic insulation installer will know to make sure to seal areas such as vents, around light fixtures, and other energy drains.   Remember, any gap in insulation will allow heat to escape.

New Call-to-action

For more information about how insulation can save you money, contact A+ Insulation online or call us at (913) 648-9290 today.

See Exactly Where Your Home Is Leaking Energy with a Thermoscan

Thermoscan of Kansas City homeIt’s no secret that sealing gaps and adding insulation is a great way to make your home more energy efficient. But the tricky part is knowing where to add that insulation and seal those gaps. Air is invisible, so you can’t see where it is sneaking out. Thanks to a cool new tool, the thermoscan, now you can!

We Can Help Pinpoint Problem Areas

All homeowners want their home to be energy efficient, but pinpointing the problem areas is critical before taking action. At A+ Insulation, we have a way to do just that – during our home energy assessment (also called a home energy audit), we use a thermoscan camera to show you exactly where warm air is escaping. A home energy assessment is the only way to tell how much energy your home uses and where the problem areas are that are causing your home to be less energy efficient. Most importantly, an assessment will give you a clear visual picture of what problems to fix first to save you the most money on energy bills.

Related Read: Free Home Energy Evaluation, Why Wouldn’t You Have This Done?

What Is a Thermoscan Camera?

Thermoscan infrared cameras are designed to pick up on heat signatures from objects. There are several names for these devices including infrared (or IR) cameras, thermal imaging devices, and thermographic scanners. They produce images called thermographs that translate heat into color so it is visible to the human eye. Our trained specialists can use one of these cameras to locate insulation voids, air leaks, moisture intrusion, thermal bypasses, and thermal bridges.

How Do Infrared Cameras Work?

Although many people think infrared cameras measure surface temperatures, they actually measure the radiant energy emitted by the surface it is aimed at. Conditions must be right to have an accurate readings from a thermoscan. These things can all affect the accuracy of a thermoscan:

  • Temperature-you need a minimum temperature difference of at least 18F° between the interior and the exterior of your home for several hours before the inspection begins. If the inside temperature is 70°F, the outside temperature should be below 52 degrees or above 88 degrees.
  • Sunlight-sunlight warms exterior walls and roofs, complicating thermographic readings. Ideally, you don’t want any sun shining on the building for at least three hours before the inspection begins. If the house has a brick or stone exterior, the sun-free interval should be at least eight hours long. Early mornings are a great time to perform a scan.
  • Moisture-Sunlight will warm moisture as well, making it appear on the thermoscan. When the sun shines on a roof, it heats up the roofing and the top of the insulation below. The insulation begins to cool after the sun sets. Damp insulation cools at a much slower rate than dry insulation, so wet spots will show up as warm spots where the roof is leaking when viewed at night through an infrared camera.
  • Wind-wind speed can affect scan results so wind speed should be 8 mph or less.

Call the Experts for Your Free Home Energy Assessment

Almost anyone can point an infrared camera at a building, adjust the knobs and get pretty colors to appear, but it takes a trained and experienced expert to tell the difference between thermal bridging, air leakage, and moisture. The energy experts at A+ Insulation can give you a free home energy assessment and let you know where your home is “leaking” energy.

Find out today by calling us at (913) 281-2250 or (816) 268-7511 or making an appointment for a free home energy assessment on our website.

New Call-to-action

What You Need to Know about Building Codes When Selling Your Home

Home for Sale in Kansas CityBuilding codes are put in place for a good reason – to ensure that buildings meet the minimum requirements that building officials consider to be safe, healthy, and reasonable. Imagine if electrical codes were never updated! Homes would still have old knob and tube wiring which, not only would be a safety hazard, would never be enough to support the electrical load that today’s appliances and electronics demand. Code updates are necessary. The team at A+ Insulation wanted to provide a quick overview of what you need to know about insulation codes and updating your home when selling it.

When Must Homeowners Update to Meet New Code Requirements?


You’re not required to update your house as codes change unless you’re doing remodeling work, and then only the new part has to meet the new regulations. When you sell your home, the new buyers will have an inspection done (often from a local home inspector or home inspection company, like GeoInspections in Lee’ Summit, MO) and at that point they will let you know what passes inspection and what they would like you to update. Making sure it meets all city building codes is the seller’s responsibility. You always have the choice to say no, but most homeowners who want to sell will upgrade the things that are deal breakers for the new buyer in the interest of closing the deal.  

How to Decide Which Items to Update When Selling


Look at the cost of the updates, convenience of doing them, and return on the sale of the house. That will decide if you should do the updates. If it will improve the value by $10,000 and cost $1,500 to do them, you’ll probably want to do it. If the cost of the updates is $5,000 and the value added is $4,000 or even $6,000, then it may not be worth it and you can duke it out with the new buyers.

Insulation Industry Codes


The insulation industry has codes that change as time marches on as well. Many older Kansas City homes don’t live up to new codes that have been updated over the years. We see it all the time. Even homes built ten years ago may have less insulation that is now required. Some homes just never had enough insulation to start with. Add to that the fact that in older homes, insulation can settle making it less effective as well. Your home will sell faster when it meets all of the codes.

Is Your Home Out of Compliance?


The best way to find out if your home complies with current building codes is to have an inspection. The insulation experts at A+ Insulation know exactly what to look for. Not only do we inspect for the amount of insulation, but we also look at the type and the condition. For instance, in homes in Prairie Village, cedar chips were commonly used to insulate attics. Today, we know cedar chips are a fire hazard and not acceptable as insulation material. We also look for signs of animal presence. Raccoons, squirrels, and other wildlife can find their way into your warm attic and leave unpleasant surprises behind. We will check for all of this and more. The best part is, our inspection is free!

Why Fix It Now?


If you know you will be selling your home in the next year or two, it makes sense to fix it now, finance it for a year, and enjoy the comfort and lower energy bills until you move. If you wait to fix it, you’ll be paying for it all at once when you move and you won’t have had the advantage of lower utility bills for a year or more. We offer one-year free financing to qualified buyers.

If you’re getting ready to sell your home, give the home insulation experts at A+ Insulation a call for an insulation inspection at (913) 281-2250 or (816) 268-7511.

New Call-to-action

Where Is Mold Hiding In Your Home?

Mold needs three things to grow – Moldy Fiberglass Insulation Pic
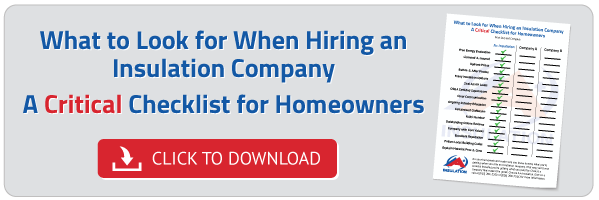
warmth, a food source, and moisture. Because two of the three conditions necessary for mold growth: warmth (temperatures between 47-120 degrees Fahrenheit), and food (wood, paper, or any organic matter) already exist in our homes, mold can grow just about anywhere there is excessive moisture. Areas where leakage may have occurred in walls, roofs, or where there has been flooding should be carefully evaluated for mold. It is critical to keep moisture out of your home.

Three Sources of Moisture

These sources for moisture need to be understood, discovered, and controlled. They include:

  1. Ground water (including snow melt, rain)
  2. Humid air (which condenses on cooler surfaces)
  3. Interior moisture (from human bodies, cooking, bathrooms, unvented clothes dryers, etc.)

The primary concern when it comes to mold is ground water. Rain and snow melt from your roof can sneak inside your home and cause major problems.

Walls, Roofs & Attics Are the Most Common Places for Mold

Because rain is a constant visitor to any area, some of the most common places for moisture to get into our homes is the walls, roof, and attic. Spring rains can cause problematic roof leaks but animals can cause damage as well. Squirrels and raccoons can tear up roofs and vents to make a cozy home in your attic. It’s important to check your attic for signs of moisture on the ceiling and in your insulation. Outside, an inspection of the exterior walls and roof can help identify potential problems before they become major headaches.

Mold Warning Signs to Look For

Building experts urge homeowners to stay alert for signs of mold, including:

  • Dampness
  • Odors
  • Discoloration
  • Peeling paint
  • Condensation
  • Compacted insulation
  • Actual mold outbreaks

With today’s buildings being built more airtight for energy efficiency, mold is more prevalent than ever because these airtight homes don’t breathe as well as older structures. To make matters worse, more complex home designs have increased the potential for moisture intrusion.

Where Does Mold Come From?

According to the Asthma and Allergy Foundation, allergies affect as many as 30% of adults & 40% of children. They also assert that asthma affects 8% of adults & 10% of children. The main culprits are dust, mold, and mildew. Mold spores are found in virtually every environment indoors and outdoors, These spores may enter homes and buildings through air infiltration such as windows, doors, heating, ventilation, air conditioning systems, or by attaching themselves to people, clothing, and pets thus bringing mold spores indoors.

How Does Insulation Grow Mold?

Some types of insulation are more or less susceptible to mold growth than others. Fiberglass is a non-biodegradable material and is resistant to mold growth. Cellulose-based insulation, made of paper materials, is the ideal food source for mold if it becomes wet. Even fiberglass can have a paper backing that would serve as a buffet for mold.

If the building was poorly designed or constructed, if there was a plumbing leak, an extreme weather event causing flooding, or if there is a leak in roof, then insulation can become moldy. In many cases, building owners will assume that the product on which the mold is growing is the cause of the problem. However it’s important to remember insulation does not cause mold; the added moisture is the culprit.

How to Remove Moldy Insulation

If your insulation is already damp or mold-infested, the first step is to fix the leak that caused the problem. Then you can replace any damp insulation with new insulation. According to the National Center for Environmental Health, in most cases, mold can be removed by a thorough cleaning with bleach and water.

If you need help, give A+ Insulation a call and we’ll be glad to inspect your attic, fix the leak, and install new insulation. Call us at (913) 648-9290 or (816) 268-7511.

Free Home Energy Evaluation, Why Wouldn’t You Have This Done?

A+-insulation-kansas-city-old-houseThe first oil crisis we faced over 35 years ago sent us scrambling to design more energy-efficient homes and plug the leaks in our existing homes. Despite everything we’ve learned over the last four decades, we continue to live in homes that leak energy.

Older Homes Aren’t Doomed to be Hopeless Energy Drains

A+-insulation-kansas-city-tiny-houses-with-tin-roofsThere are many positive features of older homes that can potentially, if they don’t already, provide energy-saving qualities. For instance, tin roofs are popular in older homes and can be restored to help reflect solar heat and keep the house cool. The biggest concern for homeowners of older houses in relation to energy waste is air leakage, followed by improper insulation. A home energy evaluation allows homeowners to prioritize their energy-saving projects to receive an excellent return on their investment.

In an older home, the task of improving energy efficiency may seem daunting, so breaking it down into smaller projects is an effective strategy. The first step to reduce your energy costs is to identify the spots where your home is losing energy. If only a qualified professional technician would do this for free. Wait, A+ Insulation offers a free home energy evaluation? Why wouldn’t you have this done?

Your Walls are Leaking!

A+-insulation-kansas-city-water-faucetThe thought of performing costly home maintenance typically scares homeowners from having a proper inspection done on their home. Putting off home energy evaluations as an attempt to avoid a potentially large bill is common, but also completely backwards. In fact, a home energy evaluation can save you money on your monthly energy bills! A+ Insulation is right here in Kansas City and can help homeowners see where energy, and their hard-earned money, is being wasted.

A Visual Inspection Reveals Energy Leaks

A+-insulation-kansas-city-visual-home-inspectionAn energy assessment will determine where you require additional insulation and where you have leaks. As a homeowner, it’s beneficial to be aware of your home’s problem areas. When these areas are repaired or sealed it can make a huge difference to your home’s heating and cooling costs. The professionals from A+ Insulation will begin with a visual inspection of your walls.

Start from the Top of the House, Your Attic Needs Help!

A+-insulation-kansas-city-attic-insulationThe first place to look is the attic, because heat rises. On a cold day your house acts like a big chimney pulling heat through every gap and crevice in the floors and walls to the top of the house. The difference between the high pressure in the attic and the lower pressure outside drives the warm air through the roof, literally.


Taking care of your attic insulation can increase the energy efficiency of your home up to 40%.

A+-insulation-kansas-city-couple-cold-at-homeThis sets off a chain reaction where the low pressure near the foundation of your house attempts to balance by sucking in the cold, exterior air. The colder it is outside, the greater the pressure differentiation is inside the house, leading to increased heat loss. Those cool “drafts” you feel inside your home are an indication.

Where Exterior Walls Leak the Most

A+-insulation-kansas-city-home-where-siding-meets-chimenyOn the outside of your home, we’ll look for places where building materials join including:

  • Corners and areas where the chimney meets the siding
  • Water faucets and gas lines
  • Sections where the foundation meets the siding
  • Any point where an opening has been cut into the walls or doors because this is a great place for small gaps to form

Where Interior Walls Leak the Most

A+-insulation-kansas-city-squirrel-in-dryer-ventInside your home, there are numerous opportunities for leaks to occur, such as:

  • Electrical outlets and switch plates
  • Window and door frames, weather stripping
  • Baseboards
  • Vents and mounted AC units
  • Fireplace dampers
  • Phone and cable TV lines
  • Gas and electrical service entrances
  • Dryer vents

Once You Find the Leaks, Close the Gaps!

Consider all the places in your home where the structure has been compromised in order to accommodate ducting, plumbing, wiring and fixtures. Each time a hole was cut through the ceiling or roof, a potential leak was created. These are relatively easy issues for insulation professionals to fix. A+ Insulation can help you choose the right materials and ensure you have the correct insulation in your walls. Remember, insulation is designed to slow down heat loss, not to stop airflow.

A+-insulation-kansas-city-spray-foam-insulationOnce homeowners are aware of the potential improvements needed in their home’s insulation, they can plan accordingly to repair them. Not every household is set up financially to tackle costly home improvement projects at the drop of a hat. The benefit of having a home energy evaluation is using the knowledge and advice offered by our technician to make a plan for what to address first, second, etc.


In general, the most important areas for homeowners to make sure are properly insulated are attics and crawlspaces. By tackling these areas first, they are insuring the most bang for their buck.

A Home Energy Evaluation is Free!

The biggest thing for homeowners to remember about our home energy evaluations is that there is no cost for having them done. At A+ Insulation, our technicians will go through your home and determine what is insulated properly and what might need additional or replacement insulation. Your A+ Insulation technician will then give you an estimate to repair the problem areas. The best part about it? There are no strings attached.

If you’re interested in seeing how much your utility costs can be cut, click here or call (913) 281-2250 or (816) 268-7511 to schedule an appointment with our technicians at A+ Insulation to get your Free Home Energy Evaluation!

Homeowner Checklist CTA Hor