Crawl space damage costs homeowners an average of $5,500 nationwide. Typical crawl space damage repair costs $1,500-$15,000 in repairs. The average cost doesn’t include repairs for the effects of poor crawl space insulation to the rest of the property. Insulating your crawl space correctly can save you a lot of costly repairs in the coming years.
Insulation’s Home Defense Role
Many of A+ Insulation’s clients request crawl space insulation work during the months with extreme weather—the hottest and the coldest months. Insulation defends your home and foundations against the elements. During seasons with extreme weather, homes without proper insulation risk costlier damage to repair, making crawl space insulation worth the cost.
Hot Weather Risks
In scorching weather, the wood components of your home will dry out. The sediment around the foundations of your home depletes in moisture, shrinking, causing the support to weaken and shift.
The opposite is also possible. If there’s a lot of humidity in your area during the hot seasons, the wood in your home and foundations could get moisture damage from being exposed in the crawl space. Mold and mildew thrive in this damp environment, and both of these things can compromise the strength and structural integrity of your wood foundations.
Cold Weather Risks
The moisture damage becomes the most significant risk to homes in colder months. Rain or snow can put a lot of moisture damage onto the wood in your crawlspace and the rest of the home’s foundations.
Another significant issue revolves around plumbing and pipes, which are often built to run through the crawl space. Without the insulation, your pipes are likely to freeze and burst in extreme cold. This problem will cost even more money from you, approximately $5,000-$70,000 depending on the damage.
The Basics of Crawl Space Insulation
The way to approach crawl space insulation is to consider it part of your home’s general conditioning. Don’t look at it as an area you want to isolate or cut off from the rest of the home. Consider the temperature in it the way you would consider the temperature within the living spaces of your house.
The goal of insulation for your crawl space is to control the temperature and moisture in it. It’s a two-pronged approach. You need to make this low area more balanced in temperature and hold it in that condition, keeping the upper floors warm. And in the same procedure, you’re protecting the foundations of your home from the elements that could make it brittle or susceptible to wear.
Preparing to Insulate Your Crawl Space
Prepare the tools, materials, and necessary equipment before you begin any work to improve the efficiency of the process. It also helps ensure that you have everything you need and won’t be looking for missing tools or materials so that all work can proceed unimpeded by issues.
Materials (Insulation)
There’s more than one option available for crawl space insulation. What’s best for your home depends on the type of crawl space you have and what it needs to maintain the temperature in the area.
-
Fiberglass
During the past decades, this has been the most popular choice for insulation. This may be the type of insulation you currently have in your home as it remains a popular option among builders. Fiberglass is a material made of a plastic matrix strengthened by glass fibers, which gives the material its name.
Fiberglass insulation can stop heat transfer through solid objects. It keeps heat from moving towards a colder area, making it ideal during the winter months. It comes in loose-fill or bats. However, it’s worth knowing that fiberglass could be unsuitable for some crawl spaces as it can cause damage to the wooden floor structure above it. Furthermore, if the fiberglass starts absorbing water, it gets too heavy and falls.
-
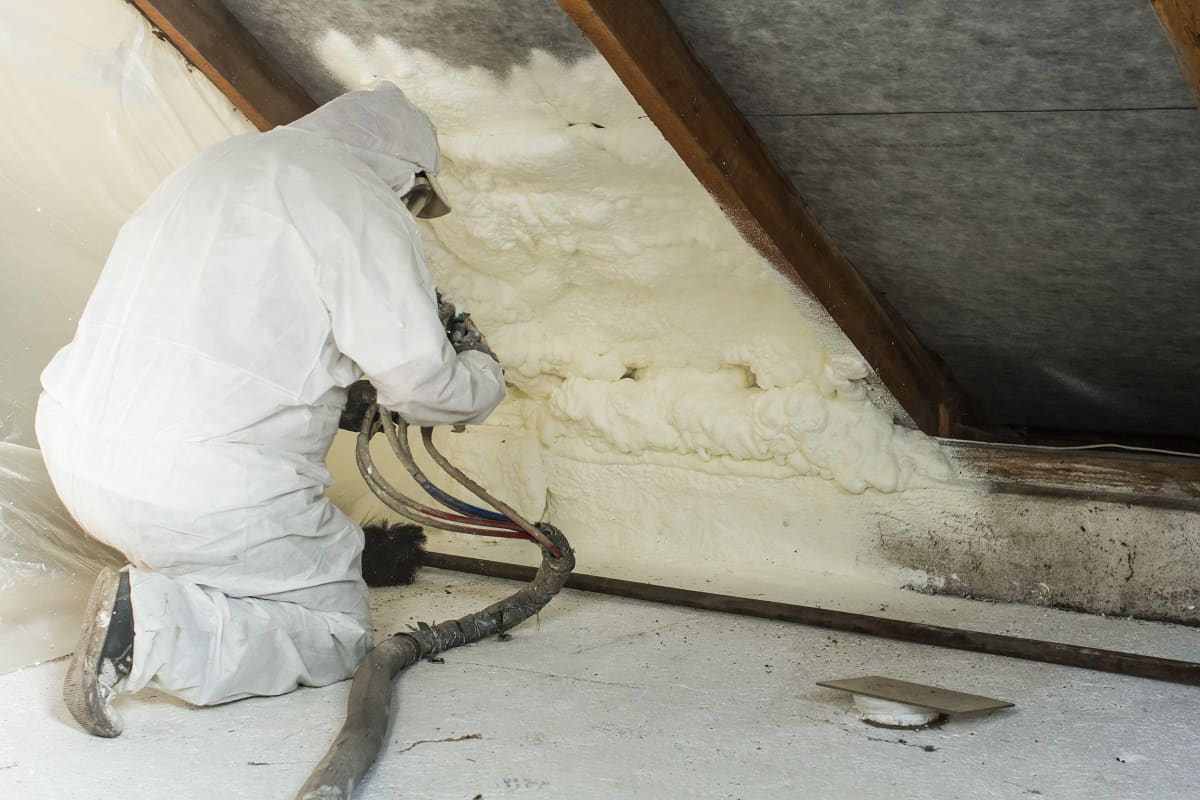
Spray Foam
Spray foam insulation comes in two varieties: closed-cell and open-cell.
Closed-cell foam insulation is more expensive, but it’s a quick and effective installation option. It helps fill gaps and can be used even around uneven areas and obstacles. It works by creating a vapor barrier on surfaces that prevent them from being damaged by water and moisture.
However, it’s a permanent solution and won’t get easily removed if something goes wrong. Keeping the layer consistent is also challenging, as there’s plenty of potential to go overboard and spray too much on.
Open-Cell foam insulation is also expensive, but not as much as the closed-cell variety. Like the closed-cell variant, it’s quick and efficient to install, but it’s also a permanent option. Unlike closed-cell, it doesn’t create a vapor barrier.
So when it comes to insulating your crawl space, closed-cell spray foam is better, as it is better suited for your needs.
-
Foam Board or Rigid Foam
Rigid board or foam-board is a cost-effective insulation solution. It’s a better option than fiberglass for this reason. It’s waterproof and stable and won’t compress or fall apart like fiberglass batts. It’s ideal for walls and crawl spaces because it prevents needing fiberglass insulation in the first place. The foam board is placed securely against the crawl space to insulate against damage.
The downside to foam board is that it’s a lot more complicated to install than spray foam and more time-consuming. The board must be cut and fitted to the spaces that need insulation and requires accurate measurements to ensure a perfect fit. It also can’t be installed over obstacles and will need to be cut in such a way to avoid them.
Equipment and Tools
While some of the equipment may depend on the type of insulation that you’ll be putting onto your crawl space, most of them are necessary for both.
- Caulking gun
- Utility knife
- Flashlight
- Saw (fine-toothed is more ideal)
- Shovel and rake for the soil
- Tape measure
- Straight edge
- The insulation material needed
Safety Equipment and Reminders
The materials used for insulation can be hazardous to your health. The materials that make up insulation can enter your lungs, make it difficult to breathe, and irritate the skin. Ensure that you use gloves, safety goggles, and a protective mask, especially when handling the insulation materials.
The crawl space will also be enclosed and difficult to move around in. Make sure you have bright lights that keep the area brightly illuminated so you can see what you’re working on. You’ll also want to wear knee pads to not hurt or scuff your knees as you move around the area.
The Insulation Process
First, you’ll need to clear your work area of debris. Make sure there aren’t any nails jutting out of the walls or over your head. Sweep away rocks or stones around the ground’s surface. And most of all, you need to eliminate any moisture sources.
This means you need to move downspouts away from your crawl space. It’s best to check the gutters of your home to see if any of them might be sending rainwater runoff down to the crawl space area.
If you have a garden, check your irrigation system. If the irrigation is causing the soil in the crawlspace to become damp or leaks water into the walls, you need to block out the water’s path and redirect it elsewhere.
Warm Climate Installation
-
Make sure that your insulation is placed securely against the surface.
The insulation must be in direct contact with the underside of your floor or the ceiling of your crawl space.
If you’re using fiberglass batts, use a crisscrossing wire to hold the material in place.
If you’re using spray foam, you can spray directly against the surface. However, you must maintain a steady hand and make sure that the insulation stays as even as possible. Maintaining even layers will keep the insulation more consistent in its performance.
If you’re using rigid board insulation, you’ll need to use mechanical fasteners. While you can use industrial adhesives to hold it in place, the mechanical fasteners will make doubly sure that the boards don’t fall.
-
Seal the space.
After adding the insulation, you need to seal up vents, doors, and any gaps that open up into this area. Use the caulking gun to seal the crawlspace’s openings. Exterior-grade caulk is the most ideal, especially for sealing vent covers, rim joists, and sills.
Look for areas with electrical wiring and plumbing. Often, these go through your crawl space, and they’ll have small gaps or openings to let these wires and pipes pass through. You’ll need to fill these areas in as well.
If you’re using spray foam installation, this is a lot easier to do as they can go over these spaces and act as the seal. But if you’re using the rigid boards, you’ll need the caulking gun to do the sealing.
-
Insulate the pipes and ducts
The pipes and ducts themselves need to be insulated as well. They have to get covered up with the insulation material and as closely as possible.
It’ll be more difficult to do this on such an uneven surface if you’re using foam boards, so try to use the fiberglass batting instead. You can also use spray foam.
Cold Climate Installation
Colder locations require adding more insulation than in hot climate areas. And it’s most effective when applied to the crawl space walls rather than the ceiling because the ground around the crawl space will be the source of the low temperature.
Rigid boards are considered the best insulation for these cases, because they control moisture better than the other types while sealing in air.
-
Cover the vents.
If your crawl space is already unventilated, you can skip this step. However, if you have a ventilated crawl space, you’ll need to remove any vents entirely and seal the area with the caulking gun.
Look for holes in the foundation as well and seal them up. You need to create as tight an airlock as possible in your crawl space.
-
Insulate the foundation.
The foundation of your home itself needs insulation along with the walls. This is another reason that foam boards work so well—it can be applied on brick, stone, and any other type of masonry.
Glue the boards to the inside of the foundation walls, or, use mechanical fasteners for even more security. After that, seal everything again with waterproof tape to create airtight and watertight insulation.
-
Look for any sources of moisture remaining inside the space.
Do a double-check of your work area to see if there are still any sources of dampness or moisture. Then you have to get rid of all of them as much as possible. The goal is to prevent condensation and dampness. This prevents mold and mildew from growing.
A good tip is to look over your plumbing pipes and check for leaks. Cover them up or seal them while you’re there in the crawl space and head off any potential problems during the cold weather.
Get Professional Inspection and Appraisal for Your Insulation
Some communities require professional inspections from a government authority to ensure that any insulation work is done according to regulation. This process not only ensures that the job has been done right, but that it’s also safe for the occupants of the house.
Insulating a crawl space can be difficult since it requires so much checking to ensure that all regulations are followed and that all areas are sealed correctly. Because of this, it’s worth hiring a professional to do it instead.
Professional contractors are well-versed in the regulatory requirements. They can also correctly calculate the amount of insulation needed and whether a space needs some or no ventilation at all. Finally, they have the equipment necessary to ensure the space is fully sealed.
Put your home’s safety and protection in the hands of professionals with long years of experience in insulating homes. Contact A+ Insulation today to request a quick quote, or browse our services to see other areas where we can do the insulation for you.