Category Archives: Residential

Insulation Installation: The Devil Is in the Details

Insulation Devil PicIt’s an old saying, but “The devil is in the details” means that mistakes are usually made in the small details of a project. At A+ Insulation, we know that is true. That’s why we pay special attention to the details, to make sure your insulation installation is superior. What details, you ask? Take a peek at the attention to detail we give every insulation job:

Energy Evaluation – Every insulation job starts with an energy evaluation. We want to see exactly where your home is leaking air (energy) and make sure we cover every source to make your home as energy efficient as possible.

Education – There are many types of insulation available, and at A+, we offer you many choices. Our experts will fully explain the pros and cons of each type of insulation from batted, to blown-in, to foam. You can make your choice with a full understanding of each product, so you can make the choice that is best for your home and your budget.

Air Sealed Light Fixture Pic
Sealed Light Fixture in Attic

Sealing Every Nook & Cranny – Once the insulation is in, it’s hard to see the details underneath it. That’s why, when we seal around every light fixture, plumbing pipe, air duct and vent, we also show you photos of it before the insulation covers it up so you know everything was done to the highest standards – A+ standards.


Related Read: How Do You Know Your Insulation Team Really Did Their Job?

Attic Ventilation – In attics, ventilation is as important as insulation. Improper ventilation will cause moisture problems including mold, mildew, and rot, and can cause ice damming on your roof in the winter. We make sure your attic is properly ventilated as well as insulated.

Related Read: Getting Proper Insulation for Your Attic – It’s a Breeze

Insulation for Attic Hatch Pic
Insulation for Attic Hatch

Attic Hatches – One of the most common places insulation companies tend to leave uncovered is your attic hatch. At A+, not only do we seal around the attic door, we make sure it is covered with insulation once it’s shut. Otherwise, this leaves a large area for air to escape reducing the efficiency of your insulation overall.


Home Protection – When we install insulation in your attic or walls, we have to bring our equipment into your home to get the job done right. But rest assured, we take every precaution to protect your home. We cover any walls that our hoses may touch with plastic sheeting, cover your floors to keep them clean, and treat your home with the utmost respect. When we leave, there will be no sign that we were there.

Walk-Through – Once the installation is complete, we walk you through your home showing and explaining what we did. We show you pictures of hard-to-get-to places like attics and crawl spaces so you can see exactly what was done in each area. We want you to feel completely confident in our professionalism and our promise.

OSHA Certified Supervisor On Site – With every installation, we have an OSHA certified supervisor on site to make sure that all safety measures are followed during every install.

When you choose A+ Insulation, you can rest assured that you will get the highest quality insulation installation. Give us a call at (913) 281-2250 or (816) 268-7511 and let us take care of every last detail.

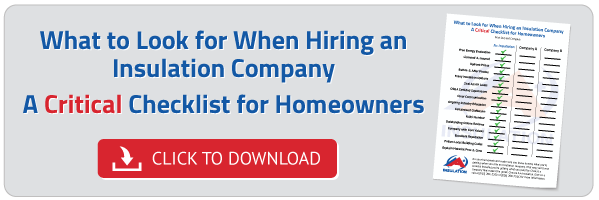
Do you know what to look for in an insulation company? Download our free checklist so you can compare insulation companies before you hire one. Just click the image below.


Homeowner Checklist CTA Hor


How Do You Know Your Insulation Team Really Did Their Job?


Crawlspace Insulation After Pic
Crawlspace After Insulation

Insulation is installed in some pretty hard-to-get-to places – attics, crawl spaces, behind walls, ceilings, roofs, etc. So how do you know when you pay for an insulation job, that the company did what they said they were going to do…what you paid them to do?


Related Read: 7 Fun Facts about Insulation and Energy Efficiency

Unsurpassed Quality

At A+ Insulation, we want our customers to know exactly what we did. We want you to feel certain you got everything you paid for (and maybe even a little more than you were expecting). We know our quality is unsurpassed, but we want you to know it too! So how do we make sure you know what we did? We show you pictures, which is why we say that our insulation installations are picture perfect.

Photographic Proof of Insulation Installation

They say a picture is worth a thousand words, and we agree. That’s why we take pictures throughout our installation process. We show you your attic before, during, and after our installation, so you can see that we delivered what we promised. Here are examples of our process and pictures:

Blown-in Attic Insulation Before Pic
Before
Attic Blown-In Insulation During Pic
During
Attic Blown-In Insulation After Pic
After


Related Read: 90% of Homes Are Under-insulated – Is Yours?


We Give You Peace of Mind

When you do quality work, it’s no problem to go the extra step to give the customer that assurance and peace of mind. After all, we want our customers to refer us wholeheartedly to their family, friends, and neighbors. We feel there’s no better way to instill confidence than to actually show them pictures of what we did. There’s a reason we’re called A+. It’s not just a name, it’s a promise.


If your home needs insulation, give us a call at (913) 281-2250 or (816) 268-7511 and let A+ Insulation do a picture perfect job!

To be sure you’re hiring the right insulation company, download this checklist to help you compare companies. Click the image below to download.


Homeowner Checklist CTA Hor


Surprise! There Are No Surprises during Our Insulation Installation

Insulation Installation Surprises PicSurprises can be great – surprise parties, surprise presents, surprise vacations. But there are some surprises that aren’t so appreciated – surprise accidents, surprise repairs, surprise bills. At A+ Insulation, we know you don’t want any of those kind of surprises.

That’s why we go above and beyond when we do an installation job to make sure you know everything. Here are some of the ways we ensure that there are no surprises with our insulation installation.

Home Energy Evaluation – First, we perform a free energy evaluation on your home. This lets you know exactly where your home is losing energy (and money). By having an energy evaluation performed, you can see where you home is leaking and where insulation will do the most good.

Upfront Pricing – No one wants a surprise bill that’s higher than they were expecting. With A+ Insulation, we always give you a quote upfront before any work is done, so you know exactly what it will cost.

All-Inclusive Quotes – Not only do we give you a quote before any work begins, we don’t have any add-ons after the quote. Some companies charge extra for sealing areas, adding ventilation, or repairing damage animals have caused in the attic. We inspect everything before giving you the quote to give you peace of mind.

Related Read: How to Evaluate Your Home’s Insulation

Process Explained – When we are in your home, we take great care to make sure you know exactly what to expect. Our team will tell you what will be done, how long it should take, and explain how we will protect your home while we do it. Our customers really appreciate knowing what to expect beforehand.

Before, During & After Photos – We know you don’t want to climb up into your attic to inspect our work. We don’t expect you to, but we do want you to see the work that was done. That’s why we take before, during, and after photos of your insulation installation so you can see that we delivered what we promised. We show you where we sealed air leaks, repaired damage, and added insulation.

Complete Home Walk-through – We give you a walk-through when the project is completed and explain exactly what we did, where we added insulation, and what kind. We want you to feel confident that we’ve done the best job possible when we leave.

With A+ Insulation, we strive to make sure the job is done right and there are no unwanted surprises anywhere along the line. You can hire us with confidence and know you will get the highest quality installation possible.


If you need insulation installed in your home, call us at (913) 281-2250 or (816) 268-7511 and let A+ Insulation make you a happy customer.

Home Energy Use Breakdown – Where Does My Money Go?

Home Energy PictureHomes use a lot of energy. But just how much does it cost to run your home? The team at A+ Insulation wondered the same thing, so we’re breaking it down for you. As a homeowner, here is where the bulk of your money goes when it comes to energy bills. We looked at a 2013 study by the Lawrence Berkeley National Laboratory for reference. Here’s how it broke down:

Energy Use Chart Picture


How to Save the Most Money on Energy Bills

We can’t live, at least, not very comfortably, without using energy. If you’re looking to lower your energy bills, there are few things you can do in each area of your home to help:

29% Heating – Obviously, heating takes the lion’s share of the energy/money. To really find out where your home is leaking energy, it’s best to have a home energy audit. From there, it’s important to insulate and seal your home to keep heated air inside. Also, remember to close the fireplace damper when not in use.

21% Electronics (computers, TVs, DVD players, home office equipment, small appliances) – Since over a fifth of your energy usage goes to electronics, one way for homeowners to cut back on energy use is to unplug appliances. Many appliances suck energy, even when not in use. This is sometimes called “vampire” energy usage or “phantom power”. Phantom power consumes 5% of all residential energy use in the United States.

13% Cooling – Once again, finding out where your home is leaking through an energy audit will help keep cool air from escaping. Make sure you have sufficient insulation and that your ducts are sealed, especially in unconditioned areas like garages, basements and crawl spaces.

13% Water Heating – There are two things you can do to lower your water heating bill. One: Lower the temperature on your water heater to 120 degrees. Two: Wrap your water heater in an insulating blanket to make it more efficient.

12% Appliances (refrigerator, dishwasher, washer & dryer) – Only wash full loads when using the dishwasher or clothes washer. Use warm or cold settings instead of hot whenever possible. Also, hang dry any items that don’t need to be tumbled dry to prevent wrinkles. Old refrigerators that are retired to the garage or basement for extra cold storage can cost $100 or more per year in energy use.

12% Lighting – The single most energy-saving action you can take is to switch all of your light bulbs from traditional incandescent to CFL or LED. These types of bulbs use a fraction of the energy, and even though they cost more initially to purchase, they will save you money on lighting bills over time and last much, much longer.

Try using these tips and schedule a free, no-obligation home energy assessment online to pinpoint where your home is leaking energy and costing you the most. We’ll be happy to help you save energy and money for years to come!

5 Ways to Keep Your Home from Losing Its Cool This Summer

Keeping House Cool PicIt’s fair to say that everyone would like to save money on energy bills. But what can you do to make that a reality? The team at A+ Insulation put together this list of doable things that will keep your energy bills lower this summer.

Sure, we’d all save money if we bought new, energy efficient air conditioners and furnaces, but that’s just not practical. We tried to stick to the things that would save you the most and the things that are fairly easy and affordable to incorporate into your busy life.

Heating and Cooling

Your heating and cooling costs make up half of your energy bills, so if you want to save money, that’s a good place to start. There are two big things you can do to decrease your energy bill.

Get a Programmable Thermostat (and use it properly)

Programmable thermostats can save you a lot of money if you’re using them properly. The Department of Energy says you can save the most by setting your thermostat back when no one is home during the day and/or at night when everyone is sleeping.

By turning your thermostat back 10° to 15° for 8 hours, you can save 5% to 15% a year on your heating bill — a savings of as much as 1% for each degree if the setback period is eight hours long.

Save energy in the winter by setting the thermostat to 68°F while you’re awake and setting it lower while you’re asleep or away from home. Set your thermostat to 78°F in the summer when you are at home and need cooling. Set it back to a higher temperature when you are away or asleep

Check Your Insulation

Homes can lose as much as 20% of their energy through a poorly insulated attic. Considering that the average U.S. family spends almost $2,000 a year on heating and cooling bills, that 20% is about $400 that could be in your bank account instead.

90% of homes in the U.S. are under-insulated, so chances are yours is too. It’s easy to inspect your attic on your own, and it could be the first step to saving big. If you can see the ceiling joists, your old insulation may have settled over time or too little was installed in the first place. Either way, you don’t have enough insulation. Attics should have at least 12 inches of insulation, but 15-20 inches is even better.

Another thing to make sure to check is that the access door to your attic is covered with insulation, as well as the rest of your attic floor. It’s an area many people forget about that costs them dearly. Learn what to look for when inspecting your attic: How to Evaluate Your Home’s Insulation

Seal Leaks

Don’t let that cold air you paid for escape! Windows and doors are the biggest culprits and adding weatherstripping and caulk can make a big difference. Checking your ductwork for leaks will also prevent air from escaping into unconditioned areas like unfinished basements, crawl spaces, and more.

Energy Star says that between improving insulation and sealing leaks, homeowners could potentially save 10 percent on their annual energy bill.

To evaluate your home’s energy efficiency, you can either perform your own home energy audit or hire a professional to do it for you. At A+ Insulation, we offer a free energy evaluation, because you can’t know the best way to save energy until you know where your home is leaking energy.

Change Your Lighting

In terms of your overall energy bill, lighting accounts for about 10%. If you’re looking to save some money over time, phase out those old incandescent light bulbs and switch to CFL or LED bulbs.

The Department of Energy says if you’re paying $6 each year to light a space in your home with one traditional bulb, you’d pay about $1.50 to light the same space with a compact fluorescent lamp (CFL) or light emitting diode (LED). That’s $4.50 in savings each year per bulb. They may be more expensive to purchase, but because they last so much longer, over their lifetime, energy-saving bulbs are typically less expensive than traditional bulbs.

Lower the Temperature on Your Water Heater

According to DOE, water heaters account for nearly 17% of a home’s energy use, consuming more energy than all other household appliances combined.

Additionally, they tell us that the most efficient water heater temperature for most homes is 120° F because dishwashers now have built-in heating boosters to raise the temperature to the necessary 145° F for sterilizing dishes. If you have a tankless water heater, it should be set to 120° F as well.

Consider wrapping your water heater with an insulation blanket and setting your water heater to vacation mode when you’re away for an extended time for more savings. These changes are fairly easy to incorporate and they will save you money not only this summer, but the rest of the year and into the future.

If you’re interested in finding out where your home leaks the most energy, give A+ Insulation a call at (913) 281-2250 or (816) 268-7511 for a free energy audit on your home.

The Story of Insulation: A Tale to Warm More Than Your Heart

History of Insulation PicIt’s safe to say that, Grog & Og did not have insulation in their cave. They were too busy trying to survive by hunting and not getting eaten to worry about freezing to death. Fire simply had to do when it came to warmth.

As humankind progressed and eventually started building homes, when did we start thinking about keeping the heat inside the home? The team at A+ Insulation was wondering the same thing, so we did a little research and this is what we found out:

The BC Years – Before Comfort

Thousands of years ago, people had to use the materials that were available. Mud was one of the first insulation materials. Both the ancient Egyptians and the Vikings used mud to keep their homes a bit more comfortable. Egyptians built their homes out of mud bricks, while Vikings plastered mud and straw in between the logs that made up their homes to keep the air and extreme temperatures out.

Ancient Times – Not Just Another Hole in the Wall

Ancient Greeks and Romans used both cork and asbestos. The Romans insulated their water pipes with cork while the Greeks discovered and named asbestos. The name asbestos means “inextinguishable” because of its resistance to heat and fire. The ancient Greeks also used “cavity walls” to help insulate.

These ancient engineers basically built a double-wall system, creating a cavity between the inside and outside. That empty space served as a barrier to keep the temperature inside steady

The Middle Ages – Life Was Hard & Cold

Homes in the Middle Ages were made from stone and were completed with roofs of thatch. They were damp, drafty, and cold. The inhabitants often used animal hide and rugs to keep the floors warm and hung tapestries on walls to keep drafts and dampness at bay.

The Industrial Revolution – Manufacturing & Asbestos

During the Industrial Revolution, asbestos became very popular. Manufacturing was big business and companies used steam to power their technology. This steam was transported throughout the buildings by pipes, which got very hot. Asbestos was used to wrap the pipes and make them safer for workers to be around.

1930s – Flappers and Fiberglass

Fiberglass was invented quite by accident in the early 30s by researcher Dale Kleist when he attempted to create a vacuum seal between two glass blocks. The stream of high-pressured air turned some of the glass into thin glass fibers.

Over the next decade this material was made into blankets (called “batts”) which began to be used widely to help make buildings warmer and more efficient. Fiberglass quickly became the dominant form of insulation in America.

1950s – 1970s Elvis Was Hot…Cellulose Was Not

Cellulose, a type of insulation made of newspaper, cardboard, straw, sawdust, or cotton, became popular because insulation manufacturers discovered how to make it flame retardant. This type of insulation was one of the earliest, but couldn’t be widely used prior to this advancement, due to fire safety regulations.

However, once experts solved that problem, cellulose insulation became very popular. In the mid­-70s, the harmful effects of asbestos were finally brought to light, causing both cellulose insulation and fiberglass batting to be widely adopted in building and construction projects. Both are still used today.

Related Read: 90% of U.S. Homes are Under-Insulated – Is Yours?

1980s – Disco Dies…Spray Foam Is Born

With the end of disco, (a silent thank you here) came polyurethane spray foam insulation. This type of insulation was actually discovered by the military in the 40s, but didn’t become popular until four decades later. The greatest thing about polyurethane spray foam was that it expands when sprayed and could fill in nooks and crannies that batted fiberglass couldn’t, thus creating a better temperature barrier.

Modern Day – Warm & Wonderful

Most of the advances in insulation in the last few decades have come in the area of spray foam. Spray foam insulation comes in two primary types: low density (“open cell”) and medium density (“closed cell”). Both are sprayed on to the interior of the wall by professional installers and expand through a chemical reaction.

The main difference between the two is that open-cell foam is neither as water resistant nor as rigid as closed-cell foam. Closed-cell foam is generally impervious to water, so another water vapor barrier does not have to be installed as part of the wall design. Both types of spray foam must be installed by professionals with specialized equipment, and while they deliver the best insulation R-values, they are also more expensive to install.

Related Read: Adding Insulation – DIY or Go Pro

Insulation: the Hardest Working Product in the Construction Industry
Luckily, insulation has come a long way, and we live a lot more comfortably than our ancestors because of it. Insulation is the only construction material that works twenty-four hours a day, seven days a week, every day of the year from the date of installation to the last day of the building’s life, no matter if anyone is inhabiting the building or not.

If you’d like to add more insulation to your home, just give us a call at A+ Insulation and one of our skilled insulation installers will answer all of your questions. Call us at (913) 281-2250 or (816) 268-7511.

Homeowner Checklist CTA Hor

DIY Insulation Inspections – A Homeowner’s Guide

Insulation Inspection PicA home that is not properly insulated will not only feel drafty, but it will also have some pretty hefty heating and cooling bills. If you suspect your home is under insulated, it may behoove you to do your own homeowner insulation inspection. There are several areas that are fairly easy to inspect. The insulation pros at A+ Insulation will walk you through the basics so that you can do your own insulation inspection.

From the Top: Inspect Your Attic

The attic is hands down the most important place in your home to ensure you have adequate insulation. In the winter, warm air rises and can escape through a poorly insulated or sealed attic at alarming rates.

Homes can lose as much as 20% of their energy through a poorly insulated attic.

Considering that the average U.S. family spends almost $2,000 a year on heating and cooling bills, that 20% is about $400 that could be in your bank account instead. When inspecting, you want to make sure that there is plenty of insulation in your attic. If you can see the ceiling joists, you don’t have enough insulation or your old insulation has settled over time. Attics should have at least 12 inches of insulation, but 15-20 inches is even better.

Do you know the R-value of the insulation in your attic? The R-value will let you know exactly how well insulated your attic is. The higher the R-Value, the more effective it is at blocking heat. In the Midwest, the U.S. Department of Energy recommends an R-value of between R-38 and R-60.

Make sure that the entrance to your attic is well-sealed without any gaps. Put weather-stripping on the edges of your attic door/hatch to keep more of your heated air down in your home. Don’t forget to check the inside of the attic door/hatch, to ensure it is well-insulated, too. Many homeowners overlook this and heat escapes right through it!

Wall to Wall Insulated Comfort

Most homeowners know the walls of their home should be insulated, but don’t know how to ensure their walls are effectively insulated. Wall cavities should be filled to capacity. It’s hard to tell just by looking, but you can remove an outlet and peek behind it. Here in Kansas City, the U.S. Department of Energy recommends insulation with a value between R-13 and R-15 for walls and cavities. For a wall evaluation, it’s best to call a home insulation expert like A+ Insulation and get an assessment. We can use an infrared camera to get a good look at the amount of insulation behind your walls.

Another approach is to look for spots in your home where there is exposed insulation. Check that insulation for an R-rating, then check with your local hardware store to make sure that this is the right type of insulation for your area. If you find that it’s inadequate, there are spray-in insulation solutions that work well to up your home’s insulation, without a huge remodeling project.

Related Read: 3 Reasons to Hire a Professional Insulation Company and Avoid DIY

Consider a Home Energy Evaluation

If you do nothing else, consider calling an insulation professional to provide you with a home energy evaluation. They will be able to tell you where you can make the changes that will affect your bills the most. Adding insulation usually pays off in 5-6 years, so don’t put it off. The sooner you do it, the sooner you’ll start saving on energy bills!

Give A+ Insulation a call today for a free home energy evaluation to find out where your home is wasting your money. Call (913) 281-2250 or (816) 268-7511.

You Can Talk the Talk, But Can You Caulk the Caulk?

Caulking Window PictureMaking your home more energy efficient will save you hundreds, if not thousands, of dollars a year if done properly. Using caulk to seal holes where heat and air escape is a great step toward having a more energy efficient home. Below are several tips from the pros at A+ Insulation for caulking your home.

Related Read: How Much Money Can You Save by Sealing and Insulating Your Home

Get the Right Gun

When using caulk, it’s a good idea to shop around for the right caulking gun. Not all guns are made the same, and you’re going to want to get a heavy-duty gun with a solid metal shaft. This will give you more control over the caulk bead, without damaging the tube.

Temperature Matters

Keep an eye on the temperature outside. With many caulks, temperature affects how easy or difficult they’ll be to use. If the temperature gets too low, caulk becomes hard and nearly impossible to squeeze out of the tube. It’s always a good idea to bring tubes inside to warm up before using them if they have been out in the cold.

Get Your Joints Ready

Whatever you’re going to caulk, make sure the area is cleared of debris and dirt. You’ll want a clean surface for the caulk to adhere to. You can use a knife or compressed air to clear everything out if need be. Just make sure there’s no dirt or dust left behind.

Use Fillers for Large Cracks

Wider joints may require a filler. In all joints that are ¼” wide and ½” deep or more, a filler will help the caulk stay in place instead of sagging into the joint. A filler  is simply a foam tube you push into the crack to take up most of the excess space. Fillers are faster and cheaper than caulk, and they create a better seal when used in larger cracks. Most window and door joints won’t be much larger than ¼ inch.

Cutting the Tube and Caulking the Joint

First, cut the tube at an angle and have the opening slightly smaller than the bead you’ll be using. Place the caulking tube in the gun and squeeze the trigger while running along the joint. If you’re particularly messy with caulk, use masking tape on either end of the joint to avoid smearing the caulk where you don’t want it. Make sure you have the most even bead possible, and don’t be afraid to use your finger to clean up any mess. Just be careful not to hit a nail or get a splinter!

With these techniques, your caulking job will be smooth and effortless, and your home will be more energy efficient.


For more help regarding caulking your home, please contact A+ Insulation at (913) 281-2250 or (816) 268-7511. We can perform a free home energy evaluation to help pinpoint the areas that need sealing.

Things You’ll Need to Know before Insulating a Cathedral Ceiling

Insulating a Cathedral Ceiling PictureUnless your home was specially constructed for energy efficiency, you can probably reduce your energy bills by adding more insulation. This is especially true if your home is older, but even adding insulation to a newer home can pay for itself in just a few years. There are some special considerations in each area of your home when it comes to insulation installation. This article from the insulation professionals at A+ Insulation will give you some tips on insulating a cathedral ceiling.

Related Read: 90% of U.S. Homes Are Under-insulated. Is Yours?

Basic Insulation Tips for Cathedral Ceilings

Cathedral ceilings are beautiful, but they must be properly insulated to keep ceiling temperatures closer to room temperatures. To do this, the cathedral ceiling must be built with space between the roof deck and your home’s ceiling for adequate insulation and ventilation. If your cathedral ceiling is built this way, it will have truss joists, scissor truss framing, or sufficiently large rafters. The best way to insulate this type of cathedral design is with batted insulation. For example, cathedral ceilings built with 2×12 rafters have space for standard 10-inch batts and ventilation.

Unvented Cathedral Ceilings or Hot Roof Designs

There is another construction option for cathedral ceilings called unvented, sealed, dense-packed, or hot roof design. The term hot-roof is misleading. The roof is not that much hotter than a normal roof, maybe 1 to 5 degrees hotter in surface temperature. A hot roof is one where the insulation is directly attached to the roof sheathing so there is no ventilation required. Don’t attempt this roof insulation with fiberglass or cellulose insulation; it’s not allowed by building codes.

Two Main Options for Insulation with Hot Roof Design

There are two popular options you can use when it comes to choosing the type of insulation for a hot roof. The first method is foam sprayed in place. The second uses foam board, generally placed on top of the exterior roof sheathing. Where spraying the inside with foam doesn’t require you to redo the roof, insulating with foam board does require that the roof be removed. If you are replacing your roof, that’s the ideal time to add foam board insulation. Otherwise, the spray foam may be your best choice. If you’re unsure about your cathedral ceiling, give A+ Insulation a call and we can come to your home and give you advice about insulating your cathedral ceiling as well as a free quote!

Call A+ Insulation for all of your insulation questions and needs at (913) 281-2250 or (816) 268-7511.

Make sure you know what to look for in an insulation company before you hire one. Click the image below to download a free checklist to help you make an informed choice.


Homeowner Checklist CTA Hor


How to Evaluate Your Home’s Insulation

Attic Insulation PictureWhen properly installed, insulation keeps your home at a uniform temperature and reduces heating and cooling costs. Insulation is found behind each interior wall in the home and is often left uncovered in attics and crawlspaces. Did you know that 90% of homes in the US are under-insulated? With that in mind, the insulation experts at A+ Insulation wanted to share some information with homeowners about evaluating the insulation in your home. How do you know if you have enough insulation in your attic, your walls, crawl spaces, or basement? Read on to discover the best way to check your home’s energy efficiency and the best way to add insulation to areas that need more.

Different Kinds of Insulation Are Used in Different Places

It is important to know that the type of insulation should vary throughout your home. Attic insulation is typically blown in or batted. (Batted insulation: fiberglass glued to a kraft paper backing to make it easier to handle and install.) Wall insulation is usually batted because it comes in a width designed to fit between wall studs. To add wall insulation after construction, it is usually blown in because you don’t have access to the inside of the walls. Basements typically have batted insulation as well. You will need to examine the various rooms in your home to determine what kind of insulation is already there.

Evaluating Insulation in the Attic

The insulation in your attic is typically visible. To examine it, simply look at the depth of the insulation. If you can see the ceiling joists, you probably don’t have enough insulation. Generally, homes need at least 12 inches, but 15-20 inches is not uncommon in a well-insulated attic. In the Midwest, the U.S. Department of Energy recommends an R-value of between R-38 and R-60.

Evaluating Insulation in a Wall

How can you see inside your walls? The easiest way to examine the insulation inside the wall is through an outlet. Turn the power off to the outlet you’re going to work with at the breaker, then remove the outlet cover. Visually inspect the insulation and measure its thickness. You can pull a piece of the insulation out of the wall if you need to examine it closely. The most common type of insulation inside walls is fiberglass batting, but blown-in or board-type insulation could have been used in more recently-built homes. Walls should be filled to capacity as any open area will allow heat transfer. Here in Kansas City, the U.S. Department of Energy recommends R-13 to R15 for walls and cavities.

Related Read: Adding Insulation – DIY or Go Pro?

An Energy Evaluation Will Pinpoint Problem Areas

The best way to determine where you need more insulation is to find out where your home is losing energy. You can do this with an energy evaluation. At A+ Insulation, we offer energy evaluations for free so you figure out exactly where a little extra insulation could save you the most money.

Call A+ Insulation for a free home energy evaluation at (913) 281-2250 or (816) 268-7511. Also check out our FREE Window Replacement vs. Insulation Price Guide by clicking the image below.

New Call-to-action